Friday, June 20, 2014

How To Camp In A Jucy at Yosemite - Part 2

Food, and it's storage b bear country, is critical.  Yes, we saw a HUGE brown  bear and boy was I glad that we wasn't having dinner out if the back if my Jucy!


At night, you'll need to store ALL of you food and smellables in the bear box , including your refrigerated items. We bought a small cooler and ice most days. Repurposing a six pack carrier worked well to easily move condiments back and forth from the van kitchen.   During the day, I used the dry sink to hold all of our picnic supplies. At night, it all went in a bag in the bear box. 

 
My final bear box tip is to put your smellables in an empty firewood box. People often leave them for the next person in the bear box with newspaper fire starter. The box is a goo way to gather your sunscreen, medications, shower items, etc and protects them from exploding food. We brought a 12 pack of pop up to the mountains and one of the seems broke. A minor mess since we had the box to protect our stuff. 

How To Camp In A Jucy at Yosemite - Part 1

Over the past seven days, the kids have counted 26 people or families that have stopped to ask us about the Jucy. Since there is so much interest, I thought we'd write a series of review. 

There are as many ways to camp as there are places to camp. If you are like us, we were a bit nervous about renting a Jucy camper van without seeing one, or even knowing someone who recommended it. Fear not, this is an awesome set-up. With a little advanced planning, you'll have a great family vacation. 

Sleep Warm
Warm campers sleep well all night and wake up happy the next day. The Jucy comes with bedding, but maybe not enough depending on the altitude you'll be staying at. For instance, it's the middle of June, and look at the low, morning temperatures: 

This morning I woke up at 8:00 and it was still cold at 55*.  Two hours later, the temperature had risen 30*, I kid you not, and I needed shorts.  We read someone else's review about the bedding and packed two red blankets that people pack for the plane, and two fleece sleeping bag liners for the kids. We also packed long sleeved pajamas/base layers to sleep in. Nathaniel did pack his summer, mummy sleeping bag because it's light (and he loves it), but I don't think he really needed it. With all the windows closed, we are quite warm and comfortable at 6,000 feet  upstairs, the penthouse stayed warm, too.  If it were earlier in the year, or higher altitude, a knit hat and gloves might be warrented.  

Finally, make sure you park in an area that is level, or with your head up hill. As this photo shows, we have our bed reversed from what the company shows in their photos.  During the day, we simply "jellyroll" everything and put it in the penthouse with the pillows and camp chairs while we are driving. 


Thursday, June 19, 2014

Yosemite Or Bust


Our first night in the Jucy, we stayed at a campground called the 49ers. They were so friendly!  When we checked in, they pointed us toward the brat dinner.  No set cost, just a donation.  One gal said they've saved many a marriage with their Friday night cookout.  Later, a cowboy named Cricket entertained folks around the campfire with songs and stories. Everyone loved his original songs.  

The next morning, we walked next door to Columbia State Park. They have a gold mining town replica, and many costumed interpreters. We decide to ride the stage coach, and got robbed!!!  The pulled chicken BBQ and sasperillas were wonderful at the country restaurant, and we bought 5 hard candy sticks for a dollar at their grocery store. The blacksmith and tack shops are a must see, as well as the candle shop where the kids dipped candles for Father's Day. 

Jamestown was our last stop before heading to Yosemite. We missed the last train ride of the day, but saw the famous #3 steam engine ride the roundhouse and be put away for the evening.  This train has been in countless movies and TV shows over the years, and is still being used in films.  The guys really likes looking around at all of the equipment. 


Good Bye San Francisco, Hello Juicy


Before leaving the San Francisco area, we took some iconic photos of Lombard Street in bloom (ahhhhh) and the Golden Gate Bridge from Sterling Park. They were just beautiful!  I still can't get over the grade of the streets. I think my ankles now have muscles. 

Uncle Rob was a jem and drive us to the Juicy rental. Given all the other colorful murals we've seen on the outside of the rental RV's, we're pretty lucky.   We got the full tour of our nearly new van, and she even threw in some partial fuel tanks upon request. We stopped at a bakery outlet about two blocks away, and away we drive toward Yosemite. 

Monday, June 16, 2014

San Francisco with Uncle Rob


Uncle Rob wanted to get out of the house and show us around town. He drive us passed city hall, Twitter and alike, then we went to the Ferry Market. We had a wonderful lunch at their favorite restaurant, Crapevine. The last photos are on top of Twin Towers, where we could see both the Bay Bridge and the Goden Gate Bridge. Look at the tree in the background!

Touchdown San Francisco

E


The iconic things that go had in hand with sanfrancisco are only part of this enormas city. The food should be much higher up on the list. 

Euchre at 10,000 Feet


How to Play Euchre

It was the first commercial flight for our kids, and everyone did well. We even played a little Euchre to pass the 4 1/2 hours. Madeline thought the take off felt like riding a roller coaster. Southwest constantly served us free snacks and drinks; our two checked bags full of camping clothes and gear were free as well. On the way home we'll choose seats away from the wings so we can see more of the United States below. 
 
If you've never played Euchre, it's a game many people in Michigan play.  Want to try it?  Instructables.com had a great tutorial here:  http://www.instructables.com/id/How-to-Play-Euchre/


Tuesday, June 10, 2014

The Only Easy Day Was Yesterday


We have been planning a great adventure to California with the kids for six months. While there are many things to do and see in San Francisco, we are the most excited about visiting with our family, Uncles Rob and Jim.  

The weeks leading up to our departure have been eventful, to say the least. Illness and the passing of loved ones have caused us to pause and reflect as our prayer list grew and grew.  In our own home, we've had the stress of an ill dog who has needed not one, but two surgeries this month.  While the timing was awful, our Lacey dog had surgery yesterday and we picked her up from the hospital on the way to my mom and dad's home. She will recover there while we are away, so we spent time going over the home care with mom and getting the dog all tucked in, as Kim would say. I don't know what we would do without our four, wonderful parents!

As I was typing this post, my husband called his father to see how he's feeling.  Mike learned that his witty and wonderful Uncle Jim, who has been chronically ill for some time, had passed away. Unbelievable. What a difference one day can make. We'll think of Jim tomorrow, as we fly west to catch the sunrise, and be thankful that we can be near Uncle Rob during this difficult time. Jim was a joy to talk to; he will be deeply missed. 

Thursday, April 24, 2014

Oatmeal Travel Packets

I grew up on my mom's oatmeal.  She believed in a hot breakfast every morning.  Whether or not I was awake enough to eat it before school was another matter altogether.  I'll admit that I usually have a piece of peanut butter toast and coffee at home, but when I'm camping I LOVE to eat oatmeal.  Something hot in your stomach feels wonderful in the morning, and all you need is hot water to make it.  I cheat when we have our camper by running water through the coffee machine and using that to make the oatmeal before I brew my coffee.  It's easy, and it works! 

The individual packages of flavored oatmeal from the store are too small for my teens.  Even I add regular oatmeal to the package stuff when I'm at home.  When I am packing up my pantry for camping, here is my recipe for oatmeal.


Creamy Homemade Fruit Oatmeal Packets
1-cup quick cooking oatmeal
3 tablespoons powered coffee creamer
2 tablespoons dried fruit or (2 tablespoon fruit preserves)
2-3 teaspoons confectioners sugar - more or less to taste
Optional: Add a little cinnamon, pumpkin spice, salt or brown sugar

Directions for Each Oatmeal Packet:
Place 1/2 cup of the oats in a blender and grind until powdery. Then place in freezer zip-lock bag along with all of the other ingredients.
 
To Make: Open the bag and pour 1/2 cup into a bowl.  Add 1/2-cup boiling water, mush and wait.  If you like thick oatmeal, use less water and if you like thinner oatmeal use more water.


Instant Oatmeal Travel Packets 
3 cups Quick-Cooking Oats
1 teaspoon Salt
Small sized Zip Baggies

Put 1/2 cup oats in a blender and blend on high until powdery. Set aside in a small bowl, and repeat procedure with an additional 1/2 cup oats. If you're using a food processor, you can do the 1 cup of oats in one batch. Put the following ingredients into each zip baggie: 1/4 cup un-powdered oats, 2 Tbsp. powdered oats, and 1/8 tsp. salt. Store in an airtight container.

To serve: Empty one travel packet into a bowl. Add 3/4 cup boiling water. Stir and let stand for 2 minutes. For thicker oatmeal, use less water - for thinner oatmeal, use more water.

Variations:
Apple-Cinnamon Oatmeal- To each packet add 1 Tbsp. sugar, 1/4 tsp. cinnamon, and 2 Tbsp. chopped dried apples.
Sweetened Oatmeal- To each packet add 1 Tbsp. sugar or 1 packet 'Equal' artificial sweetener.
Brown Sugar/Cinnamon Oatmeal - To each packet add 1 Tbsp. brown sugar & 1/4 tsp. cinnamon
Oatmeal w/Raisins & Brown Sugar - To each packet add 1 Tbsp. packed brown sugar and 1 Tbsp. raisins.
Health Nut Oatmeal - To each packet add 2 Tbsp. any kind of wheat germ
Fruit & Cream Oatmeal - To each packet add 1 Tbsp. non-dairy coffee creamer and 2 Tbsp. dried fruit
Fun Fruit Oatmeal - To each packet, add 6 or 7 pieces of 'fruit snack' type dehydrated fruit.
Confetti Oatmeal - To each packet, add 1 tsp. decorative cake/cookie sprinkles.
S'More Oatmeal - add 6 miniature marshmallows and 1 Tbsp. Milk Chocolate Chips to each packet.
Cookies n Cream Oatmeal - add 1 crushed Oreo cookie and 1 Tbsp. non-dairy coffee creamer to each packet.
Exploding Oatmeal - add 1 tsp. sugar, and 1/2 tsp. 'Pop Rocks' candy to each packet. This one is fun for celebration days, such as birthdays.
Bart-man Oatmeal - add 2 Tbsp. 'Butterfinger B.B's' candies to each packet.

We especially like raisins, chocolate chips and dried apples in our mix. I'll add some other flavor combinations below.   Enjoy!


Wednesday, April 23, 2014

Tripadvisor Hotel Bookings


Hello, again.  My life has wandered through many holidays and mountains of snow since my last post.  Today I'm planning our summer camping adventure to California.  For those of you who mix up the hotels and camping experiences, I've just read an article that I'd like to share. 

If you'd like to know how to find a clean hotel that doesn't break the bank, read this article from About.com: http://gocalifornia.about.com/od/calodging/a/we_choose_hotel.htm.
These travel writers taught me how to use the website www.tripadvosor.com

Here is my take-away:
  1. Google your hotel and find the tripadvisor.com source for the hotel.
  2. The first line will show:
  3. The number of circles filled in - you want 3 1/2 or more. 
  4. The number of reviews - you want more than 30 reviews for the   above circles to be reliable.
  5. The average price indicated by the number of $ signs.
  6. Look for the ratings on this preview: 23 out of 108 (hotels in this city).  The lower the number, the better.
  7. If all of the above information make you feel pretty good about this hotel, click on the link and look at both the cleanliness and value ratings.


I'm feeling much more confident about booking a hotel for a couple of days in San Francisco before we rent a camper and head out to Yosemite National Park for a week!

Enjoy, Tammy

Reviews of Hotels, Flights and Vacation Rentals

Wednesday, November 20, 2013

DIY - The Only Camping Stove You'll Ever Need


This is genius!  The only cost is the knife you already own and the fuel - rubbing alcohol.  If you need a lightweight camping stove for back country camping, or an extra burner for cooking a big Sunday morning brunch at the campground, this is the stove for you!  Grab a tall, aluminum can out of your recycling bin, a pocket knife, and let the DIY lesson begin.  


Tuesday, November 19, 2013

DIY Popcorn Maker for Camping


See, camping recipes do NOT need to be difficult!  Popcorn is pretty tough to do while camping, unless you buy Jiffy and make it over an open flame.  We usually use a Coleman stove with the kids.  It's easy to burn yourself, or the popcorn, over an open fire.  This guy ALWAYS cracks me up. Enjoy!


Friday, November 8, 2013

DIY Intruder Alarm


Oh, the fun kids could have with a pack of mousetraps!  Can you imagine what my son's boy scout troop would do with this at summer camp?

This guy cracks me up!  But seriously, if you are back country camping, and a bit nervous about animals or other intruders, take a look at this video. 

Enjoy!

Wednesday, November 6, 2013

The Power of Camping


Many campouts are with a group of relatives, your best friends from school, or a big scout troop. 

And then there are those quiet ones, when you camp with only those closest to you. 

Or you're all alone.


This is when camping is a time to be unplugged. 

A time to travel far away from your ordinary world.

A time to be disconnected from your everyday routine.


A time to dream. 

On the ride there, walking a trail, casting along a stream. 

Pause to silently reflect on your world. 

Ask yourself questions.

Give yourself hours (or days) to find the answers. 


Dream BIG about your future.

Envision the life your want.

Sketch out ideas for change that will move you toward your goals.

Erase them, and try it again using a different perspective.


On the ride home, give yourself permission to make changes in your life.

Be at home with a revived spirit and renewed ambition. 

Believe in the power of camping. 

Sunday, October 27, 2013

How To Quickly Winterize Your Trailer

Winterize Your Travel Trailer

We own the tent trailer, or pop-up trailer as it's known.  After a couple of frosts and a bit of snow, it was time to say "Goodbye" for the winter.  Here is how we it.

Water lines: If you have them/use them, you'll need to flush the water out at home and put RV antifreeze in the lines.  We have one simple line to a sink, but many of you will also have a bathroom.  To cover all of your needs you should also read this step by step guide http://winterize.adventurerv.net/.  We always cut the label off the jug and leave it in the sink as a reminder.  FYI, we have a cutting board that covers the sink, so I also store my dish soap, etc. in there.

Rodents: They are looking for a place to live this winter.  Remove ALL food, go through every nook and cranny.   Put a couple of open boxes of moth balls on the floor.  We have never had a problem.  

Year Around Items: We'll use our lawn chairs well before spring, and the kids will use their sleeping bags for sleepovers and scout events.  Pull out everything you may need over the winter.


Valuables: Take anything that is "irreplaceable" out of the trailer. 

Propane Tank: Take it off and leave it at home.  It's easily removed and, therefore, easily stolen.

Refrigerator Switches: Ours are located on the outside of the trailer.  Flip them all to the OFF position.  We have two sets.  One behind each panel.


Locks: Place locks on the pop-up hasps and use them.  Also lock all of the exterior compartment doors with your keys.

Battery: Remove this as well and keep it at your house.  We need it to operate the electric breaks, so it's removed before we leave the warehouse.

Photos: Take a photo of the condition of your trailer and the location, including the ceiling incase of damage.

Go home and start planning a trip for next spring! 

Friday, October 25, 2013

REI YouTube Video Review

Click Here for Camping Meal Tips


Have you ever played Nintendo's Animal Crossing?  Listen closely.  Do you hear that tune in the background music REI used in this "Family Camping" video?  Maybe not, but it's close.

This camper is spot-on with his advice about keeping the meals simple, easy to pack and I love that he used a list.  It's much harder to improvise in the woods when you only have a weekend's worth of food.

Farm markets, road side stands and "living off the land" are great ways to make your food taste a bit more fresh and "gourmet".  However, I don't count on finding a maple syrup stand or a pint of fresh blueberries when I must have a topping for the ready-made flapjack mix.

I'd also avoid picking berries when you are back country hiking or camping in an area with bears.   I know, that's a "Duh Tip" for most of you, but I've watched people do it.  With kids.  Eek!

Back to the video, this hungry camper seems to be cold weather camping and mentions one of his meals: ham and sauteed onions with ready-made polenta.   I've never tried it.  Have you?  I'll put it on the list of "Big Breakfast" recipes to try at home this winter.  Everybody wants to be the "camp hero"!

Thursday, October 24, 2013

Fall Euchre Snack Mix and Festive Campsites

 
Are you looking for festive campout ideas?  I always start by looking around our house. 

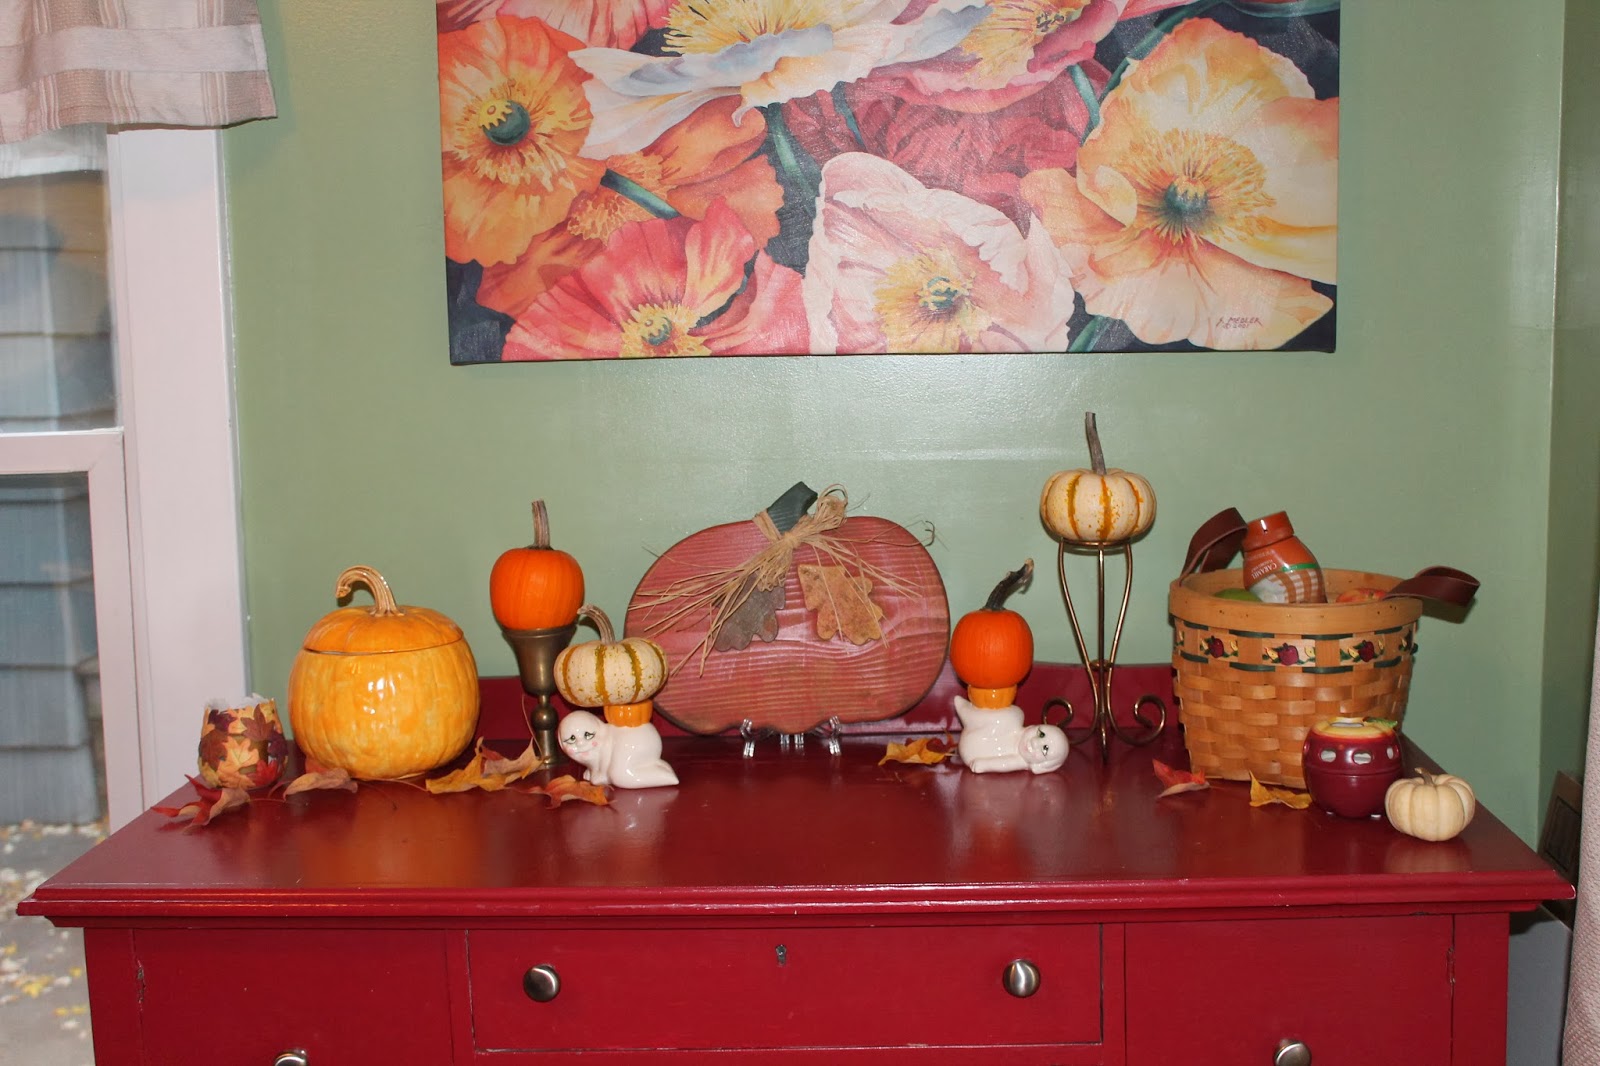
Fall Mantle
 
Fall Buffet


What can I borrow from the mantle or buffet to make my camper feel like home?


How about taking along Mr. Owl and setting some fall leaves around him on the table?


A couple of small ghosts set amongst gourds, or the ceramic pumpkin full of candy?


If you are looking for a crafty idea, maybe something to do with the kids, Frankenstein is easy to paint and adds a wonderful glow to the picnic table.  All you need is the correct size mason jar, or any jar you'd like to up-cycle, glue, two nuts that look like the correct size for "ears", and a candle.  Super cute!


My Fall Euchre Mix looks festive and is loved by everyone (especially me, because many of the ingredients can be purchased at the Dollar Store).   It can be easily put together at the campground.  A perfect job for the kids! 


    Fall Euchre Mix
 
5 cups Oatmeal Squares
5 cups Pretzels
5 cups Chocolate Animal Crackers
1 bag of Indian Corn
1 small box of Fiddle Faddle
 
       Mix and enjoy!


Tuesday, October 22, 2013

Camping Recipes From Bloggers You'll Love

I really do love to read blogs.  Especially foodie blogs.  And cottage decorating blogs.  And, oh I guess I should stop.  Anyway, I read them because I love to read happy news and because they have so many great ideas, insights and personality.  I never feel bad about deleting a blog that is unfocused or has poor information.  Sorry, folks.  Life's too short.

Today I'm excited to share some of my favorite blogs with you!  OK, BuzzFeed at the bottom is more of a bonus than a Blog, but the rest of them are blogs.  I am able to follow all of these foodie blog authors on my page at BloglovinClick here to access my easy list, then simply click to follow as many authors as you'd like to enjoy their regular updates.

If you like these, there are plenty more camping and travel blogs listed on my blog page.  Feel free to critique these, as I'm looking to edit my list for variety and examples of the very best in camper blogging.  I hope you'll comment and link to other blogs you read to love.  It's always fun to try something new.

And now here it is.  The camping recipes your family will love!  Click on the link below the photo to grab recipes for some great grub. 

 The Camp Gal

5 Fantastic Fall Camping Recipes - Dutch Oven Pumpkin Corn Bread, Apple Cider Toddy, Campfire Baked Apples, Salted Carmel Hot Chocolate, Veggie Chili

 Six Sister's Stuff

25 Delicious Camping Recipes


Rachael Ray


Add caption


Serious Eats


20110309-127677-Serious-Sweets-SmoresBrownies-PRIMARY.jpg

Dirty Gourmet


Friday, October 18, 2013

Igoogle Closing, Where To Read Blogs

 igoogle shutdown

Unbelievable!  Igoogle has been my homepage for half a decade, but igoogle will be gone in just a couple of weeks on Nov. 1.  According to artechnica.com, Google may be it's own replacement.  Huh. 

Now, I know some of you are simply pinning something from your favorite site to your Pinterest account to use as a port-hole.  I LOVE my Pinterest boards, but making a Blog Pinterest board is just not the same, or even close to the same, as an igoogle homepage.

Igoogle is how I follow my favorite blogs.  Oh, and I have a fantastic collection of blogs to read!  They are beautiful.  They are insightful.  They are a friendly way to start my day.  They show me travel destinations I'd like to see.  These blogs have adventurous, new recipes.  They share tips and tricks to fix my everyday chaos.  They are the way I become a better mom to two teens.  A better wife to my LEO hubby.

About six months ago, I signed up for Digg.  They have an import function that was super easy, and an app as well as a website.  But the website sucks.  After all the work of setting up Digg, I loathed the day I would need to start over, scouting around to find an acceptable way to view my blog collection. 

This week I found it: Bloglovin.  Now THIS is a website!  Importing my blogs from igoogle was a snap, as was adding blogs I was kinda interested in from posts on pinterest.  And, I could add my own.  You can too by clicking here:


So make the switch now to Bloglovin, or Digg if want choices.  Let me know what you think.  If you have another idea for easily following blogs, leave me a comment below.  See you soon!

<a href="http://www.bloglovin.com/blog/11081057/?claim=vwkqdwu2ygs">Follow my blog with Bloglovin</a>


Thursday, October 17, 2013

Back to Blogging!

I'm Back!


Have your lungs ever been so full of "gunk" that when you laid down it felt like you were drowning?  Bronchitis Stinks.   I've spent a LOT of time on the couch lately, too sick to get up and clean the cobwebs I noticed on the ceiling. 

So I just laid there and stared at them. 

Frustrated and coughing. 

I thought about the things I wished I could be doing, and the things in my life that I really wasn't missing.  For two weeks.  At some point, I realized that I wished I hadn't given up on the idea of blogging.  And later on, I felt well enough to tackle the cobwebs and the ghostly stain in the carpet.

Friends, it's been WAY too long since I've posted about our travels. I have this idea that I would really like to go back to blogging as a hobby.  It was a fun project!

A year after starting this blog, I've been reflecting about the reasons we have so many great memories of our family trip to Glacier National Park.  I think it's because we took time to talk and write about it. 

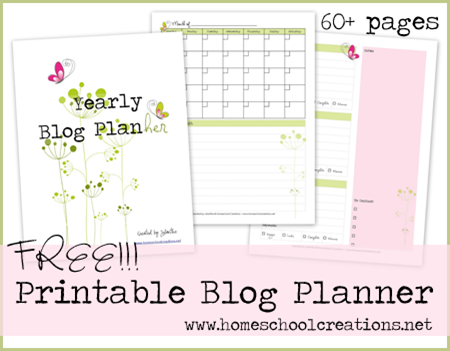
Blog Planner
 

So, I'm going to give this another shot.  I've stumbled upon a great website with a blog organizer I'm going to try using.  Jolanthe at http://www.homeschoolcreations.net/2012/07/free-printable-blog-planner/ did a BEAUTIFUL job creating this organizer, and I thank her for the free download.

It's just what this renewed hobbyist needs!

Share Buttons